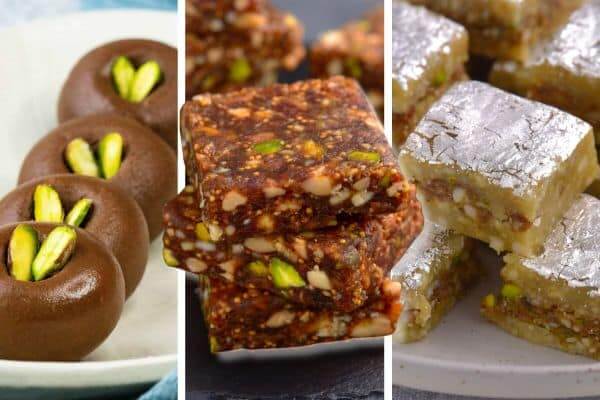
My wife Bhavna and I, both diehard foodies, have been pottering around in the kitchen making some Diwali mithai. Here’s three that we made that came out finger-lickin’ good. A pat on the back to us!
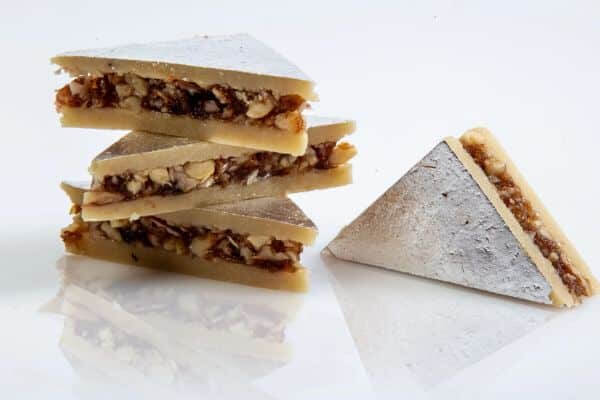
Sandwich Kaju Katli
We’re hoping to make a lasting impression on our guests with the classy Sandwich Kaju Katli. It’s got a delicious filling that combines different flavours and textures for a festive treat, a Diwali mithai they won’t forget!

Ingredients
For the kaju (cashew) base:
2 cups cashews
3/4 cup sugar
1 tbsp ghee
1/3 cup milk
For the stuffing:
½ cup mixed nuts (almonds, pistachios, walnuts)
1/4 tbsp gulkand (rose petal preserve)
1/4 cup dates, pitted
Instructions
To make the kaju base:
Coarsely grind the cashews in a food processor until they reach a fine, powder-like texture. Be careful not to over-grind, or it may release oil and become pasty.
Add the sugar to the ground cashew powder and pulse together in the food processor until well combined.
In a pan, heat the ghee over medium heat. Add the cashew-sugar mixture and pour in the milk. Stir continuously, ensuring the mixture doesn’t stick to the pan.
Keep stirring until the mixture comes to a thick, homogenous dough-like consistency. It should come together and pull away from the sides of the pan.
Transfer the mixture onto a tray lined with parchment paper. Spread it evenly to form an even layer with a rolling pin. Let it cool for at least 1 hour to firm up.
To make the stuffing:
In a food processor, combine the mixed nuts, gulkand, and dates. Pulse until the ingredients come together into a sticky, slightly chunky paste.
Spread this mixture on a baking sheet to spread it evenly. Keep it aside.
Assembling the Kaju Katli sandwich:
Once the cashew base has cooled, spread the nut and gulkand stuffing mixture evenly over half of it.
Fold the other half of the cashew base over the stuffing. Press it gently to seal the layers together.
Place the tray in the refrigerator for at least 1-2 hours to allow the kaju katli sandwich to set and firm up.
Once set, cut the into desired shapes.
Fig and Date Nut Bars
These are a naturally sweet and healthy snack, making them the perfect guilt-free Diwali mithai for snacking. I recommend bringing out the air fryer for these. You could cook it in the oven or on the stove, but best keep the heat low.
 Ingredients
⅔ cup dried figs
⅓ cup dates, pitted
1 cup mixed dry fruits (cashews, almonds, pistachios)
Instructions
Soak the dried figs in water for about an hour to soften them. Once softened, remove the tips and drain the excess water.
In a blender or food processor, blend the figs and dates together into a thick, smooth paste. Set aside.
Coarsely chop the mixed dry fruits (cashews, almonds, pistachios).
In a preheated air fryer at 170 deg C, add the nuts and cook for 7-8 minutes. The nuts should turn golden and aromatic.
Add the fig and date paste to the pan with the roasted nuts. Cook for 8-10 minutes @ 170 deg C, mix them in between the cook.
Transfer the mixture to a tray lined with baking paper. Spread it evenly across the tray using a spatula to create a smooth, even layer.
Allow the mixture to set in the fridge for about an hour, until firm.
Once set, cut into desired shapes.
Chocolate Peda
A fusion twist that brings together the best of ricotta cheese and the classic peda – Diwali fudge, yum.
 Ingredients
½ kg ricotta cheese
1 cup milk powder
¾ cup sugar (adjust to 1 cup for extra sweetness)
3 tbsp cocoa powder
2 tbsp ghee
Instructions
In a blender or food processor, combine the ricotta cheese, milk powder, sugar and cocoa powder. Blend until the mixture becomes smooth and lump-free.
Heat a heavy-bottomed pan over low heat and add the ghee.
Pour the blended mixture into the pan. Cook on low heat, continuously scraping the sides and stirring to prevent sticking.
Keep cooking and stirring until the mixture becomes thick and starts to leave the sides of the pan. The consistency should be dense, but still soft enough to shape.
Turn off the heat and transfer the mixture to a bowl to cool slightly.
Once it’s cool enough to handle, take small portions of the mixture and roll them into smooth balls.
Gently press the centre of each ball to flatten it slightly, giving it the traditional peda shape.
Let the pedas cool completely before serving or storing them in an airtight container.
Read more: Diwali through the ages


